Mobile Game Development Studio
Home
About Us
Our Games
Hyper-Casual
Casual Games
Don’t Get Caught
Hordes of Enemies
noded
kubic
Whip Swing
Witches’ Brew
Kids Apps
Coloring Book
Cars & Trucks Puzzle
Train Puzzles for Kids
Animal Puzzle
Fairy Tale Puzzles for Kids
Find the Differences
Support
Privacy Policy
Select Page ...
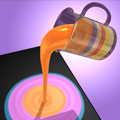
Fluid Art!
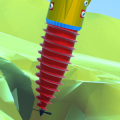
Operator 3D
Journey 3D
Don't Get Caught
Hordes of Enemies
kubic
Featured Games & Apps
Fluid Art!
App Store / Hyper-Casual
Operator 3D
App Store / Hyper-Casual
Journey 3D
App Store / Hyper-Casual
Don’t Get Caught
App Store / Casual Games / Google Play
Hordes of Enemies
App Store / Casual Games / Google Play
kubic
Amazon / App Store / Casual Games / Google Play / Windows / Xbox
We use cookies to ensure that we give you the best experience on our website, if you continue to use this site we will assume that you are happy with it.
OK
Privacy policy